How to paint skies in Watercolour
As a beginner to watercolour painting, I remember the intimidating feeling, looking at that sheet of relatively expensive watercolour paper, taped and ready to go. You have drawn your landscape then notice that almost two thirds of it is the sky (gulp)…….
Here is how I approach painting skies. I’m not saying it is THE way it’s just my simple approach to it.
THINGS TO BEAR IN MIND
The principle of perspective still applies to skies. That is that clouds look smaller in the distance towards the horizon, and are bigger above your head.
The other consideration is that the colour is usually deeper above your head than on the horizon. Look at the sky where you are now and you’ll see what I mean, unless, like me you have a grey cloudless sky.
When you look at a sky, the colour is usually different if you pan the view side to side, painting skies with that in mind adds variety and interest.
I once read that you should ‘paint a sky a day’. You can do this, just a quick small study, say postcard size, try it for a few days, and you’ll soon be looking upwards and analysing it and trying to work out how you would paint it in watercolours. Ask yourself questions like ‘are there hard edges in the sky’ or ‘is it all soft edges’ it may (and usually is) a combination of the two.
HOW TO APPROACH IT IN YOUR PAINTINGS
When I consider a sky in a landscape, I usually decide how important it’s going to be in the finished painting, and how big or important the sky is. This also helps me to decide how low the horizon will be, in other words will the sky take up 1/3rd of the painting, playing a supporting role in the painting. Or is it an important and dominant feature in the painting, and make up 2/3rd of the paper. Or will it even feature at all.
I usually make this decision based on the subject matter. It rarely works if the sky has lots happening in it, as it can detract from the main focus of the subject.

In this painting the subject matter was all about the house so the sky was painted very flat and without any details at all. It also hardly features in the finished paintings overall composition.
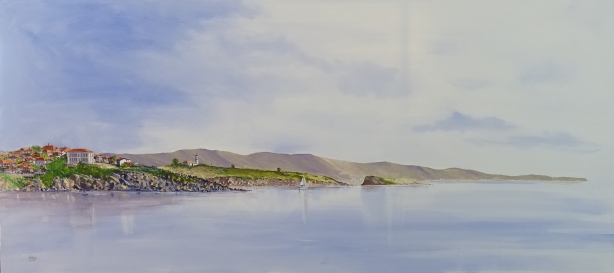
So the first question even before you draw, or put colour to paper is to ask yourself is ‘how important and dominant is the sky in the painting’. That should hopefully help you to make those decisions. In the painting at the top of this blog ‘Calm morning for a sail’ my painting was all about the grandeur of the scene of Burgas Bay, so it takes up almost 2/3rds of the painting, though I painted it softly, without hard edges, so that the centre of interest, Sozopol Town, and the yacht in the foreground, were still dominant.
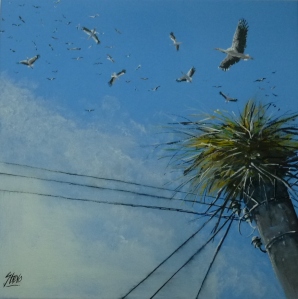
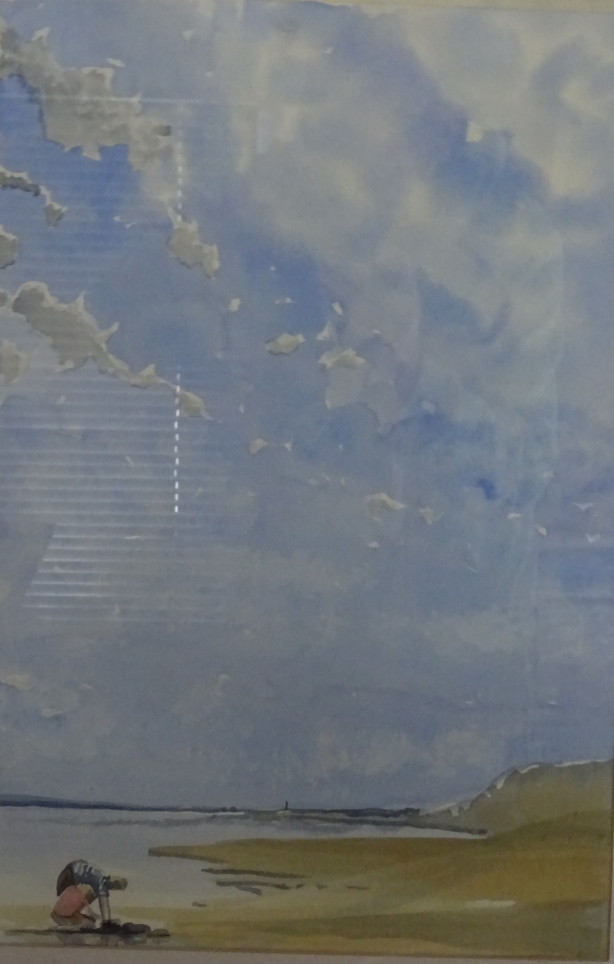
In the painting above called ‘Excitement in the Village’ the painting was all about the sky, with it’s unusual viewpoint the sky fills the whole painting, as the villagers look skyward, to welcome the returning storks in Springtime.

In my painting ‘The Windmill and The Islands’ you can see how the stormy sky behind the white sails and the lighthouse is an important part of the painting. The overall look of the painting, done as a commision based on old sepia postcards of the ancient town of Sozopol, and that decided the overall colour scheme of simply Sepia, Cobalt Blue and Indigo.
SO HOW DO YOU ACTUALLY PAINT IT ?
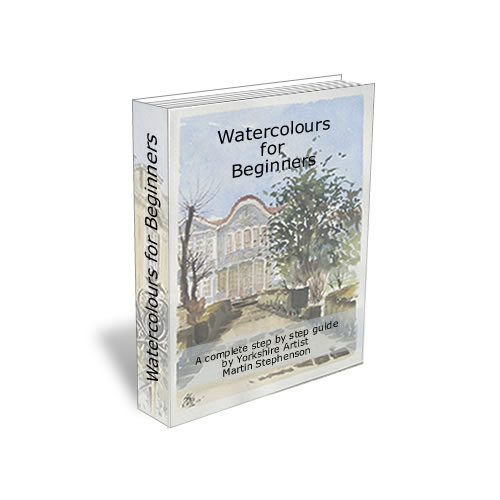
Having made all those decisions regarding composition this is how I actually tackle it. It’s all important to bear in mind ‘THE GOLDEN TIME’ that is the time it takes for the shine to go off the paper. A whole chapter is devoted to this subject in my free e-book ‘Watercolours for Beginners’. This is the link to my book READ OR DOWNLOAD IT NOW
This golden time, as I call it depends on a lot of factors like
- THE THICKNESS OF YOUR PAPER
- HOW HOT IT IS WHERE YOU ARE PAINTING
- HOW HUMID IT IS WHERE YOU PAINT
Because I am usually painting and teaching in warm climates, this can be as little as 4 or 5 minutes, this means that when you start you have as little as 4-5 minutes to paint the whole sky…… NO PRESSURE THEN tick tock !

So before you start your painting, wet a small test strip of the paper you are going to paint on, with either paint or water. Don’t make it too wet just a film of fluid, now check your watch and keep and eye on the paper. When the shine goes off the paper, check your watch again, and this is YOUR golden time.
If you fiddle after the shine has gone you will just end up with a muddy mess. Also if you paint with too much water you will end up with unsightly back-runs (the dreaded cauliflowers).

LET’S START WITH AN EASY ONE – A CLOUDY SUMMER SKY
This is painted wet into wet, in other words wet paint on wet paper. The secret to painting skies is to make sure you have your paint ready mixed, and also that you have more than enough to paint the sky. This is the main reason I use tubes of paint, and mixing bowls.

So assuming that your paint is mixed ready. Try say Cobalt Blue mixed with a little pink to warm it up.
I start by gently wetting the sky are all over with clean water. I usually use diagonal strokes of water at about 45 degrees. Try not to go over the same area more than twice, or it may lift the texture of the paper and give you black marks. I’m left handed so paint right to left, if you are right handed work left to right.
TIP If you work with the light in front of you, you can see where you have been.
Cover the whole sky area with the water, I usually use a big round or mop brush for skies. If you have mountains, cut around them carefully. If you lift your brush vertically you can be very accurate in these areas. Laying the brush flatter, and using the side of the brush means you can cover the area very quickly.

Depending on how big your painting is, your golden time, and how fast you paint. Before you start to use your paint, check the damp paper especially where you started, if it has started to lose it’s shine already go back over the area again with water. Once you have a consistent film of water you are now ready to paint.

Work quickly using the same diagonal brushstrokes, as you approach the horizon use less paint and it will go lighter towards the horizon. If you want some soft clouds just leave some areas without paint. Once the sky are is covered consider the shapes of the clouds. If you want to alter or extend them, now is the time to consider doing it, as long as there is still shine on the paper.

We will create the clouds with two ‘lifting off’ techniques, one with your brush another using tissue. Wash you brush out THOROUGHLY then squeeze it on a towel or kitchen paper, or squeeze the brush between your fingers removing most BUT NOT ALL of the moisture. I call this a ‘thirsty’ brush. Lift out the cloud shapes, then rinse and repeat until you are happy with the sky. If you want hard edged clouds try crumpled up kitchen paper. Keep changing the shape of the paper after each cloud to avoid a pattern, remembering that every cloud is usually a unique shape.
TIP A combination of hard and soft cloud shapes usually works best.Lifting off with a brush gives more subtle clouds, tissue less so.
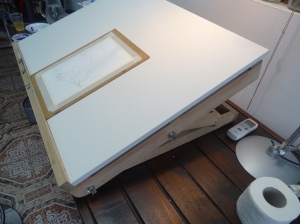
If you want more movement in the sky tip your board, or paint at a slight angle. I usually paint on an angle of about 15-20 degrees on my home made board.
If you do tip your painting, take care with the bead of paint that will collect, and be ready to mop it up with your thirsty brush, or the corner of kitchen towel.
NOW LEAVE IT ALONE
The shine will have gone by now (especially on those areas where your clouds are) any fiddling at this stage WILL ruin your freshly painted sky.
Carefully wipe around the taped edge to avoid paint bleeding into your painting as the paper dries flat. Dry the sky with a hairdryer on slow speed checking the tape as it dries.
If you need to tidy up any edges, say around the mountains, wait for the painting to dry then get the shapes back with a moist flat brush.
I usually try to paint my skies like this in ‘one hit’, as I think it makes for a fresh and lively looking sky.

Here is how the sky looked in my finished painting ‘Light and Shade in Meteora’
I hope you liked this blog on painting a Summer sky in Watercolours, next time Stormy Skies !
PLEASE FEEL FREE TO LIKE, COMMENT AND SUBSCRIBE TO MY BLOG.

You can find lot’s more tutorials on my Youtube channel by clicking on this link below
My youtube channel